Hey people reading this!
I've discovered this website (also comes as an app) called Padlet. You can make an account for free here: http://padlet.com/. Padlet is a software that basically gives you a wall. This wall can be used for anything, including presentations, profiles, and collages, or even as a blog itself! You can insert most media, such as links and videos. Padlet is very simple and easy to use. Take a look at the "About Me" wall I made with Padlet! http://padlet.com/wall/colourfuldecorations
Everything about Padlet is very basic: image, title, description. You can resize images and customize the background. However, like Bamboo Paper (an app I described before here), there is something appealing about it. I think it is a very effective way to convey whatever information you want to convey. So go ahead, and create your own wall here!
Sorry, this was a bit short. G'luck with your wall ;)
-Constance Wang
0 Idea Friday 1- Cute Gifts
Hey, everybody!
This is my first Idea Friday. Today's theme is cute gifts. I've compiled a list of the ten most adorable gift ideas I've found online. If you are interested in learning the tutorial, just click on the image. If you find anything else, just post them in the comments section, that's what idea jams are for! Here they are:
 Fun, Jersey knit bracelet. Find out how to make it!

I am in LOVE with these bird's nest necklaces.
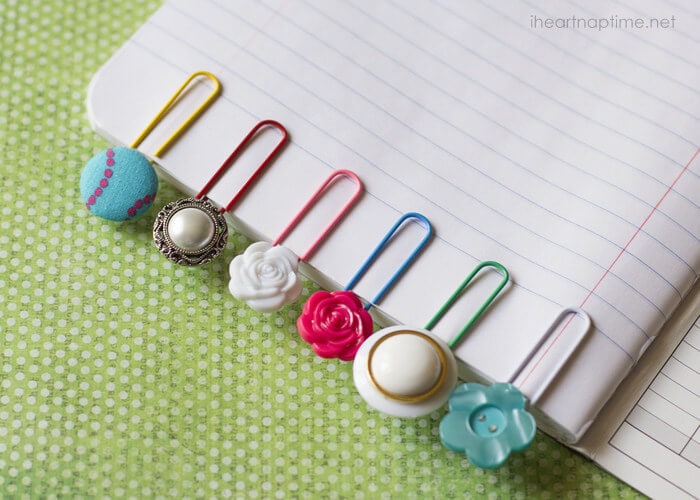
Cute little button paper clips. Very simple and economic!
 Absolutely adorable pin cushion jugs. This is an awesome idea.

A reversible coffee cup sleeve. The button hook is really creative.
 This is such a creative way to make earrings. They're actually from yarn wrapped around paper clips. The result is fabulous!
 Out of all, this might be my favourite. It's a clock, that actually ticks! On top of a paper plate.

This is an ingeniously adorable notebook, made with hole punched playing cards. Click to find out more.

Just in time for Easter! These bottle gifts are getting really fun. The bunny ears are a really nice touch.

Money origami is just so fun! Am I the only one who thinks so?
Honestly, I just love these ideas. Thank you to all the people who shared the tutorials! I hope I can try out some of these ;)
-Constance Wang
This is my first Idea Friday. Today's theme is cute gifts. I've compiled a list of the ten most adorable gift ideas I've found online. If you are interested in learning the tutorial, just click on the image. If you find anything else, just post them in the comments section, that's what idea jams are for! Here they are:
Fun, Jersey knit bracelet. Find out how to make it!I am in LOVE with these bird's nest necklaces.
Cute little button paper clips. Very simple and economic!
Absolutely adorable pin cushion jugs. This is an awesome idea.A reversible coffee cup sleeve. The button hook is really creative.
This is such a creative way to make earrings. They're actually from yarn wrapped around paper clips. The result is fabulous! Out of all, this might be my favourite. It's a clock, that actually ticks! On top of a paper plate.This is an ingeniously adorable notebook, made with hole punched playing cards. Click to find out more.
Just in time for Easter! These bottle gifts are getting really fun. The bunny ears are a really nice touch.
Money origami is just so fun! Am I the only one who thinks so?
Honestly, I just love these ideas. Thank you to all the people who shared the tutorials! I hope I can try out some of these ;)
-Constance Wang
0 Last Minute Card Making
Hello again!
Who here is guilty of leaving things to the last minute? I sure am. Yesterday was my mom's birthday, and unfortunately, I was being a bad kid and I forgot. I only thought of it about an hour before she came home. However, I found this pack of blank cards you could draw on. You can buy them, too, at Curry's, or any other retailing art store! However, Curry's seems to be the most convienient. Just go here: https://www.currys.com/catalogpc.htm?Category=STRATHMORE_CREATIVE_CARDS&Source=Search. You can also find my previous post about their charcoal pencils and manilla paper here: Project of the Week 4- Charcoal Hand Sketches
As you can see (if you clicked the link), these cards come in many different sizes and quantities. They are also on a very good sale. The pack I purchased had twenty, standard sized cards. They even came with envelopes, which makes it a perfect gift to display your artwork in. Here is what it looks like.


They're pretty neat. Now, here is the card I sent to my mother. I had to do this in about an hour, so naturally, the painting wasn't too detailed...
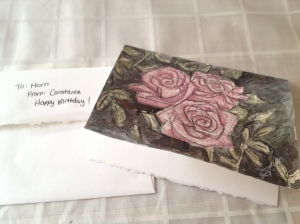
The only complaints I have about this card is that it became very bumpy, after I painted it with watercolour (which is very reasonable), and that the paint seeped through a little. However, that was fixed after I pressed it under a large book. The charcoal outlining I did on it became a tiny bit smudgy, but there was nothing I could really do about that.
All in all, I think this is a great product! Nice job by Strathmore Artist Papers. So, take a look if you want. These cards are great for showcasing your art, and sending some nice wishes to anyone you know. Thanks for reading,
-Constance <3
0 Finally Done ;)
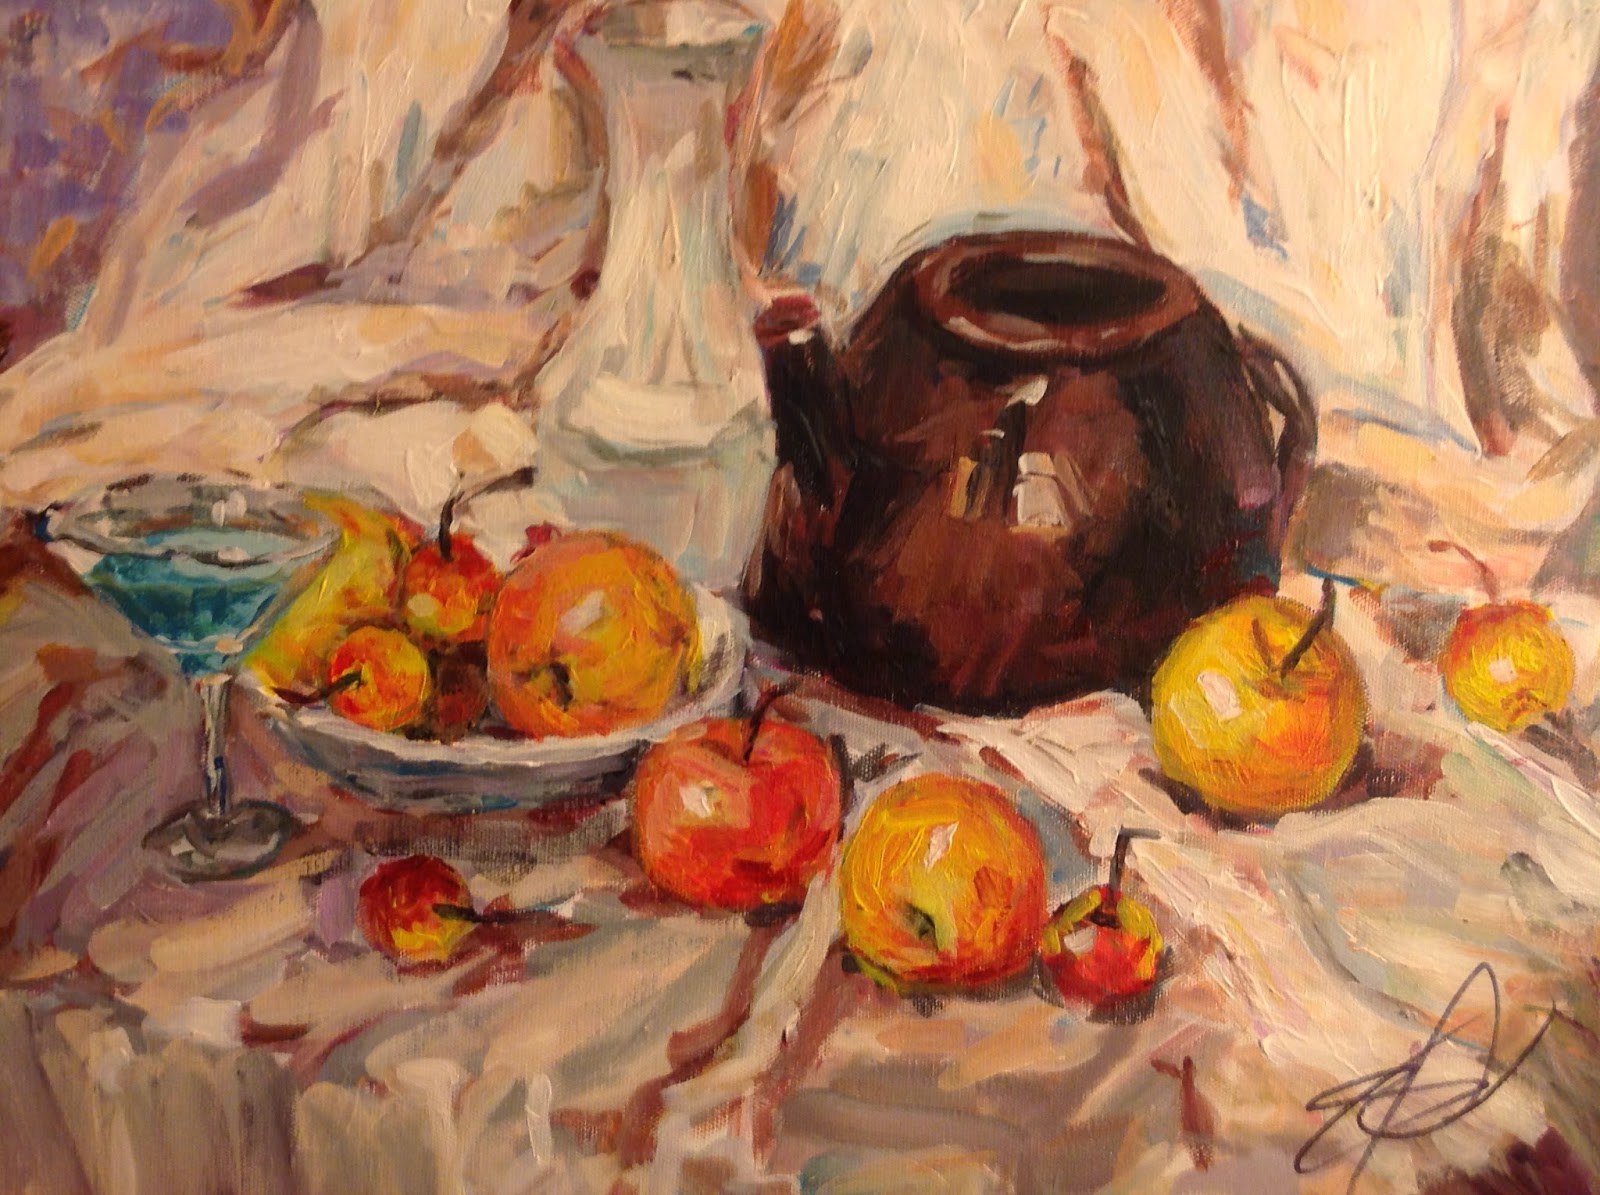 |
| Hello everyone, I’ve finally finished this painting. It took me around 6 sessions, which would be 18 hours. They do say that art is not done in a day. |
0 Introducing: Idea Friday!
"Creativity comes from a conflict of ideas," said Donatella Versace, who has certainly come up with great ideas herself. This is why I've decided to come up with with my weekly idea jams, called "Idea Friday". Each week, on Friday, I'll be posting a compilation of my favourite ideas, on a certain theme. This could be anything, from cut and paste crafts to ambitious architectural designing.

I was inspired by http://timkastelle.org/blog/2010/01/using-jams-to-select-ideas/. However, at this moment, I can't really hold online talk sessions, but that's where you can come in! I'd love to be able to hear your thoughts on my idea collections, and as always, feel free to contribute! It's a great feeling to know that everyone is inspiring, helping, and shaping each other's ideas.
I really can't wait to get started. See you all on Friday ;)
-Constance
0 Project of the Week 5- Elegant Frame
Hey, everybody,
It's my fifth project of the week, and I'm going to share this elegant frame I drew- unlike, most, it's actually hand drawn. Yes, it might seem weird. I mean, why would someone just draw a frame? Recently, I've been looking at these lacy balcony designs. If you take a look at my fourth #5days2decor8 entry here, you will see that I used a lot of classy lace, or swoops and other patterns. Then, at school, I made a 'postcard', and the frames were amazingly fun. I decided, to well, design more frames. Here is my first:

I will hopefully do some more as the week progresses, and I have more time. However, if you have some beautiful frames you either found online, or drew yourself, you can send them here to colourfuldecorationsemail@gmail.com.
Happy framing,
Constance
2 Houzz
Hello to all decor8ers!
I have come here to share this incredible home designing app I have recently installed. It's not just an app, it's... everywhere. They have it for iPad, iPod, Android, etc. And of course, you can visit their website here: http://www.houzz.com/.
Basically, they do everything from retailing interior decorating products to sharing photos to adding 'ideabooks'. You can easily sign up with your email, and be able to view all their ideas and products. They have functions such as 'find a pro,' where you can view all the interior decorators, designers, etc, in your location. Houzz is extremely blog friendly, and it has share buttons and codes to embed any images you want to share. Some of the ideabooks are really helpful. Here are my two favourite articles!
15 Was to Create Drama with Light Fixtures
Guest Picks: What's Purple all Over?
Here's a gallery of some amazing photos I found via Houzz ;)
[houzz=http://www.houzz.com/photos/421791/Parkwood-Road-Residence-Master-Bedroom-transitional-bedroom-minneapolis]
[houzz=http://www.houzz.com/photos/6139867/Beauty-Drawers-for-the-Bathroom-traditional-bathroom-milwaukee]
[houzz=http://www.houzz.com/photos/7925097/Whitefish-Private-Spa-and-Pool-House-contemporary-bathroom-other-metro]
Hope you check out Houzz!
Constance
0 Fun ASCII Art Generator
Hello,
I'm back again! Now I have found something pretty cool, that you might want to check out. An ASCII art generator. As you might have seen in my last post, I copied off this really cute signature of three hearts. I started to wonder if I could draw large scale images with text. And I found this! You send in a picture, and it converts it to text. Here's a sample. Very simple.

This was the original:

I had to crop it a little bit, though. But for the most part, it works pretty well. There are also options such as font size, colour scheme, and maximum width. You can find this text art generator here:
http://www.glassgiant.com/ascii/
Show this off to all your friends!
~Constance
I'm back again! Now I have found something pretty cool, that you might want to check out. An ASCII art generator. As you might have seen in my last post, I copied off this really cute signature of three hearts. I started to wonder if I could draw large scale images with text. And I found this! You send in a picture, and it converts it to text. Here's a sample. Very simple.

This was the original:
I had to crop it a little bit, though. But for the most part, it works pretty well. There are also options such as font size, colour scheme, and maximum width. You can find this text art generator here:
http://www.glassgiant.com/ascii/
Show this off to all your friends!
~Constance
0 Project of the Week 4- Charcoal Hand Sketches
Hi, guys!
It's the fourth project of the week already. These aren't really little projects any more, they're starting to become works of art, or ideas instead. Today I'm going to share two hand sketches I did with charcoal pencils on manilla paper. Basically, I did some shopping at Curry's yesterday, and I got a pack of four charcoal pencils- in white, light, medium, and dark. They were very bright, vibrant, and easy to smudge. You can find it here: https://www.currys.com/product.htm?Product=D39000&Source=Category&Category=DERWENT_CHARCOAL_PENCILS.
![IMG_1160[1]](http://colourfuldecorations.files.wordpress.com/2014/03/img_11601.jpg?w=224)
With that, I also decided to purchase a pad of manilla paper, which was pretty cheap! You can find that here: https://www.currys.com/product.htm?Product=MAN1824PA&Source=Category&Category=NEWSPRINT_AND_DRAWING_PADS.
For some reason, I like to sketch hands. It's like some sort of internal desire. So I made some poses with my left hand, and started sketching. As a general thing, all my poses are weak and hesitant. Like a bended finger pointing to the right. Or a curved, skeptical hand in the stop position. I suppose that's my style.
I used the light to sketch an outline of the pencil. Then, when I fixed everything up, I used medium to retrace the lines. I scribbled with the light for the shadows, and with the white for the highlights. I also added some medium to the darker areas. I then re-lined the whole thing in a bold dark. Here they are.
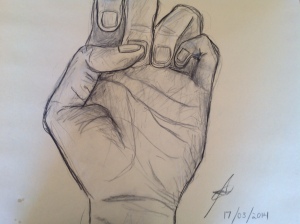
![IMG_1163[1]](http://colourfuldecorations.files.wordpress.com/2014/03/img_11631.jpg?w=300)
(¯`•.•´¯) (¯`•.•´¯)
*`•.¸(¯`•.•´¯)¸.•´
¤ º° ¤`•.¸.•´ ¤ °º ¤
Think this is pretty awesome ;)
It's the fourth project of the week already. These aren't really little projects any more, they're starting to become works of art, or ideas instead. Today I'm going to share two hand sketches I did with charcoal pencils on manilla paper. Basically, I did some shopping at Curry's yesterday, and I got a pack of four charcoal pencils- in white, light, medium, and dark. They were very bright, vibrant, and easy to smudge. You can find it here: https://www.currys.com/product.htm?Product=D39000&Source=Category&Category=DERWENT_CHARCOAL_PENCILS.
![IMG_1160[1]](http://colourfuldecorations.files.wordpress.com/2014/03/img_11601.jpg)
With that, I also decided to purchase a pad of manilla paper, which was pretty cheap! You can find that here: https://www.currys.com/product.htm?Product=MAN1824PA&Source=Category&Category=NEWSPRINT_AND_DRAWING_PADS.
For some reason, I like to sketch hands. It's like some sort of internal desire. So I made some poses with my left hand, and started sketching. As a general thing, all my poses are weak and hesitant. Like a bended finger pointing to the right. Or a curved, skeptical hand in the stop position. I suppose that's my style.
I used the light to sketch an outline of the pencil. Then, when I fixed everything up, I used medium to retrace the lines. I scribbled with the light for the shadows, and with the white for the highlights. I also added some medium to the darker areas. I then re-lined the whole thing in a bold dark. Here they are.

![IMG_1163[1]](http://colourfuldecorations.files.wordpress.com/2014/03/img_11631.jpg)
(¯`•.•´¯) (¯`•.•´¯)
*`•.¸(¯`•.•´¯)¸.•´
¤ º° ¤`•.¸.•´ ¤ °º ¤
Think this is pretty awesome ;)
0 Project of the Week 3- Social Media Icons
Hello!
It's the third project of the week! I've been blogging for almost a month. WOW. Anyway, let's get started.
Everyone loves social media icons, right? But some of them are just too... plain. Like the ones I had on my sidebar before this... I wanted some that matched my theme. So I decided to draw some. For this, I used an iPad app called Doodle Paper (you can go read my post about iPad art here: https://colourfuldecorations.wordpress.com/2014/02/21/ipad-art/).
I basically drew a set of nine social media icons, following these simple steps.
1. Draw a watercolour blob. Yes, it's very simple. Just select the watercolour function and the colour you want, and scribble out a blob.

2. Draw a smaller, darker, watercolour blob to inside. This will mimic the gradient effect.

3. Then, select the pen function, and draw a sketchy, inverted picture of your desired social media icon.

4. Crop it. Put it into the size you want, and then post it in some online photo dumping grounds. I believe Photobucket is the best, and you can get an account for free here. http://photobucket.com/.
Don't worry, you don't have to make a social media icon this way. The possibilities are endless, especially with a very flexible app like Doodle Paper. You could even draw it on paper. However, if you want to grab my social media icons, you can find the images here:
Google Plus:
http://i328.photobucket.com/albums/l333/constancezwang/e56bfcda-8a7d-4365-81cd-2c121e9fce3e_zpsa6e18f83.png
http://i328.photobucket.com/albums/l333/constancezwang/e56bfcda-8a7d-4365-81cd-2c121e9fce3e_zpsa6e18f83.png
Happy drawing!
0 Sophie's Artwork
Hey, everyone!
I'm going to share @TongSophie’s art for #5days2decor8. It is truly amazing, and if you want your art featured on this blog like Sophie's, follow the instructions on the 5days2decor8 tab! Wednesday is the deadline.

By: Sophie Tong
Description: This room is inspired by a mix of my life and my fantasy. It's a place that expresses who I am. I love music and reading so why not have a shelf of albums and books right? :) There are some little things that I have added to the room (like the Polaroid camera, headphones, feathers, the Starbucks drink, and the Union Jack, etc) that are just some small inside jokes and hidden messages in my life. This would be a room for me to escape reality (and fly to Neverland ;) Can you tell I'm a massive geek yet? :D
I just love her work. If you want to share your design too, go here!
*Submissions are closed*
Happy creating!
I'm going to share @TongSophie’s art for #5days2decor8. It is truly amazing, and if you want your art featured on this blog like Sophie's, follow the instructions on the 5days2decor8 tab! Wednesday is the deadline.
By: Sophie Tong
Description: This room is inspired by a mix of my life and my fantasy. It's a place that expresses who I am. I love music and reading so why not have a shelf of albums and books right? :) There are some little things that I have added to the room (like the Polaroid camera, headphones, feathers, the Starbucks drink, and the Union Jack, etc) that are just some small inside jokes and hidden messages in my life. This would be a room for me to escape reality (and fly to Neverland ;) Can you tell I'm a massive geek yet? :D
I just love her work. If you want to share your design too, go here!
*Submissions are closed*
Happy creating!
0 5 Days to Decorate- Day 5
Hello, peeps!
It's day 5 (already?) of #5days2decor8! You can still submit artwork until Wednesday and have it featured here. Just fill out the form in the "5days2decor8" tab, and send you picture to colourfuldecorationsemail@gmail.com.
Today's theme is... my favourite: Anything you'd like to add! Here is my design, which is a dream closet.
It's a pretty cool green design, with hexagonal cubbies. The large hexagonal in the middle is for clothes, and the smaller ones for undergarments and accessories. There is a large hexagon carved into the wall, with a rod for hanging coats and other larger items.
So everyone, go crazy! Create whatever you'd like. My original idea before this was an indoor roller coaster. Have fun!
0 5 Days to Decorate- Day 4
Hello!
Before I begin, I have a side note. The project of the week will be delayed until Wednesday, because #5days2decor8 has been taking up most of my time. Sorry about that!
Today's the fourth day of #5days2decor8! The theme is your dream living room. I think this one is my favourite (so far). Here it is!

I put my living room on the portrait view, because I thought that would better portray my design. This lacy, black and white theme, with subtle hints of brown is my favourite. I really do love the lace print chandelier, and I've always dreamed of having full sized windows!
What I love about living rooms is that they can vary so much. You could design them all multicoloured and geometric, or flowy and draped. To me, this is the most fun room to decorate!
Good luck!
Before I begin, I have a side note. The project of the week will be delayed until Wednesday, because #5days2decor8 has been taking up most of my time. Sorry about that!
Today's the fourth day of #5days2decor8! The theme is your dream living room. I think this one is my favourite (so far). Here it is!
I put my living room on the portrait view, because I thought that would better portray my design. This lacy, black and white theme, with subtle hints of brown is my favourite. I really do love the lace print chandelier, and I've always dreamed of having full sized windows!
What I love about living rooms is that they can vary so much. You could design them all multicoloured and geometric, or flowy and draped. To me, this is the most fun room to decorate!
Good luck!
0 5 Days to Decorate- Day 3
Hi, everyone!
It's day 3 of #5days2decor8 and also clock switching day! Today's theme is your dream kitchen. This is what I did!

This is a bit of a cool, geometric, but multi coloured kitchen. My favourite parts are the hexagonal chairs and the gradient cupboards at the top.
Have fun designing <3
This is a bit of a cool, geometric, but multi coloured kitchen. My favourite parts are the hexagonal chairs and the gradient cupboards at the top.
Have fun designing <3
3 5 Days to Decorate- Day 2
Hey all
It's day 2 of #5days2decor8! Sorry I couldn't post this in the morning... But here you go! My dream bathroom!

I've always thought of bathrooms as separate rooms themselves, and this couldn't hold more true in my classic "clean and green" theme. I saw a kitchen with a similar theme- green and brown and white on Houzz (which is a great app, go get it). I just incorporated some triangles (like that cute towel rack) and here you go!
Good luck with your dream bathroom!
It's day 2 of #5days2decor8! Sorry I couldn't post this in the morning... But here you go! My dream bathroom!
I've always thought of bathrooms as separate rooms themselves, and this couldn't hold more true in my classic "clean and green" theme. I saw a kitchen with a similar theme- green and brown and white on Houzz (which is a great app, go get it). I just incorporated some triangles (like that cute towel rack) and here you go!
Good luck with your dream bathroom!
2 5 Days to Decorate- Day 1
Hey, all!
It's day 1 of #5days2decor8! Today's theme is your dream bedroom. Here is mine.

Much thanks to @Decor8yourlife for inspiring me to make this with her Victoria's Secret themed bedroom!
So have fun designing your dream bedroom, and I hope it turns out great. I'd love for you to fill out the form on the 5days2decor8 tab submit your drawings to colourfuldecortationsemail@gmail.com. Your work can then be featured on this blog!
Good luck ^_^
It's day 1 of #5days2decor8! Today's theme is your dream bedroom. Here is mine.
Much thanks to @Decor8yourlife for inspiring me to make this with her Victoria's Secret themed bedroom!
So have fun designing your dream bedroom, and I hope it turns out great. I'd love for you to fill out the form on the 5days2decor8 tab submit your drawings to colourfuldecortationsemail@gmail.com. Your work can then be featured on this blog!
Good luck ^_^
0 Introducing: 5 Days to Decorate!
Calling all interior decorators!
Do you love designing? Well, this is the contest for you. I have come up with #5days2decor8! This is an art challenge, in which you design 5 different rooms. You can fill out the contact form on the 5days2decor8 tab, and submit your pictures to colourfuldecorationsemail@gmail.com to have your work FEATURED on this blog! Any mediums are accepted.
Do you love designing? Well, this is the contest for you. I have come up with #5days2decor8! This is an art challenge, in which you design 5 different rooms. You can fill out the contact form on the 5days2decor8 tab, and submit your pictures to colourfuldecorationsemail@gmail.com to have your work FEATURED on this blog! Any mediums are accepted.
Day 1- Dream bedroom
Day 2- Dream washroom
Day 3- Dream kitchen
Day 4- Dream living room
Day 5- Whatever extra room you'd like to add to your dream house!
Happy designing!
0 Cute School Crafts
Hey, world!


Although I like painting and sketching a lot, I never miss out on a chance to do some cute arts and crafts work! Here's a link from Spoonful to an adorable collection of 21 back to school (even though it's March) projects. However, there are some projects for young kids. I love the notebooks though!
Sorry, this post was short, but I hope this helps!
0 Project of the Week 2- Plaid Watercolour Painting
Hello, all!
This is my second project of the week, and I really do like it! It's a cool plaid watercolour painting, with black pen over it. It took around three hours. Here it is!

I started out by lining up all of the plaid pattern (which I made symmetrical). I got this idea that I could do it in split colours, a blue theme, and a red theme. I actually ended up copying a large portion of my pattern from my plaid shirt. I layered thick and thin lines, and came up with this.

Then, I started painting. I tried to use a ruler to make my lines straight, but the paint bled through, which looked cool. I started out with the blue side, and used cerulean and prussian blues, with some purple and green. For each blue colour, I assigned a red colour. This painting was made messy on purpose to contrast with the neatness of the black pen.

When I waited for the paint to dry, I ended up getting impatient and just dabbed the water away with a tissue. I outlined all the pencil, and tried to erase what was left of it. And then, almost as an afterthought, I dipped the end of my paint brush into some dense watercolour paint, and scribbled with it. The effect was hard and chalky, which I found contrasted nicely with the watery neatness.
That's how I made my painting. You can recreate this if you want, maybe with a thicker pen, or different colours. If you make one that turns out nice, you can send them to me at colourfuldecorationsemail@gmail.com.
Thanks for reading this!
This is my second project of the week, and I really do like it! It's a cool plaid watercolour painting, with black pen over it. It took around three hours. Here it is!
I started out by lining up all of the plaid pattern (which I made symmetrical). I got this idea that I could do it in split colours, a blue theme, and a red theme. I actually ended up copying a large portion of my pattern from my plaid shirt. I layered thick and thin lines, and came up with this.
Then, I started painting. I tried to use a ruler to make my lines straight, but the paint bled through, which looked cool. I started out with the blue side, and used cerulean and prussian blues, with some purple and green. For each blue colour, I assigned a red colour. This painting was made messy on purpose to contrast with the neatness of the black pen.
When I waited for the paint to dry, I ended up getting impatient and just dabbed the water away with a tissue. I outlined all the pencil, and tried to erase what was left of it. And then, almost as an afterthought, I dipped the end of my paint brush into some dense watercolour paint, and scribbled with it. The effect was hard and chalky, which I found contrasted nicely with the watery neatness.
That's how I made my painting. You can recreate this if you want, maybe with a thicker pen, or different colours. If you make one that turns out nice, you can send them to me at colourfuldecorationsemail@gmail.com.
Thanks for reading this!
Subscribe to:
Posts (Atom)